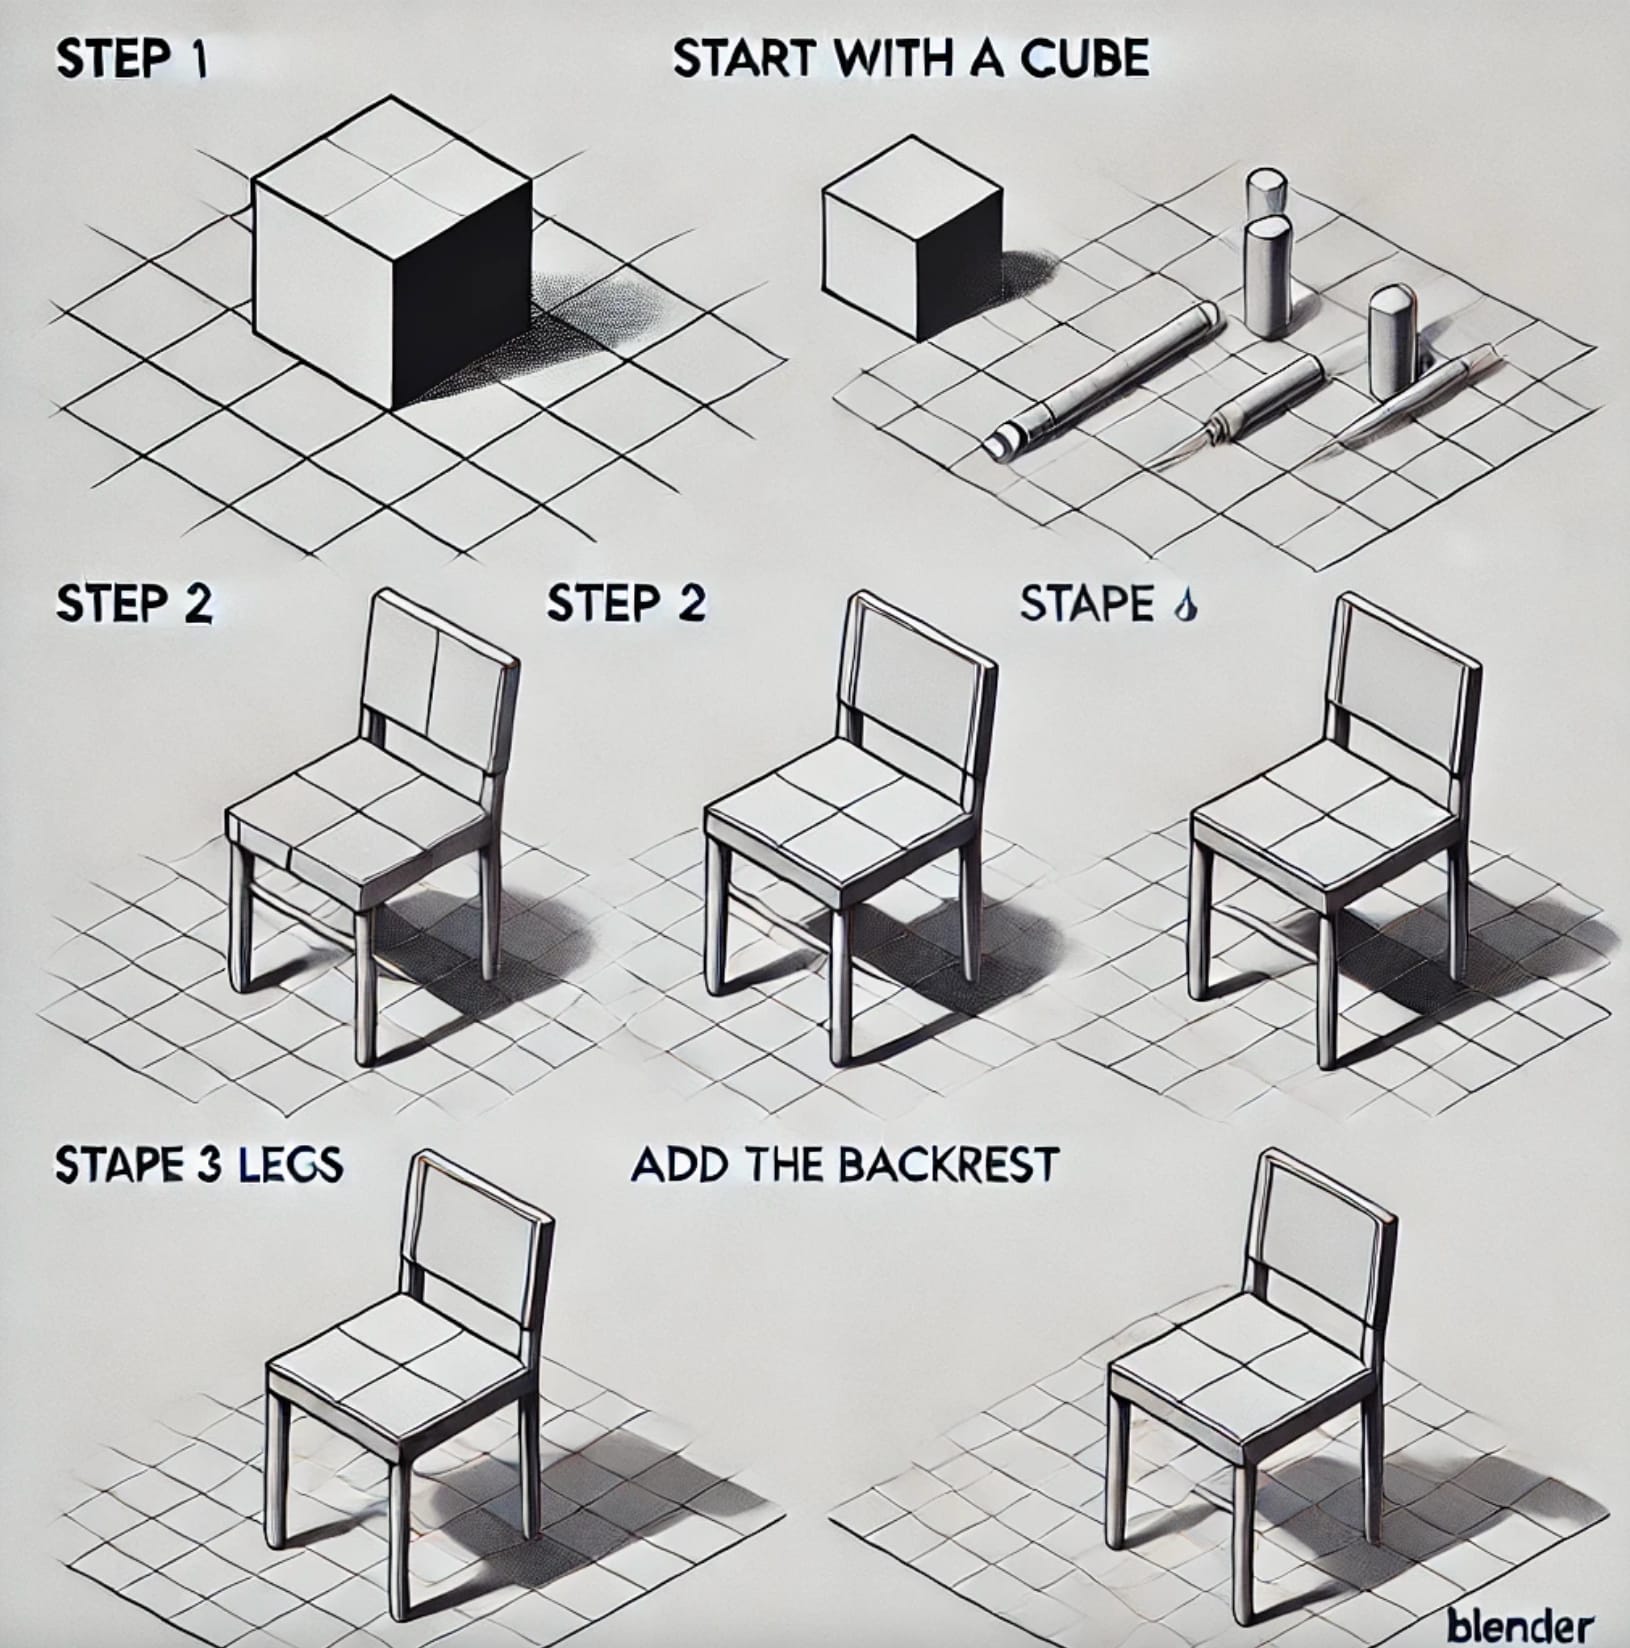
Modeling a Chair
Step 1: Setting Up Your Workspace
Open Blender and create a new file. Delete the default cube by selecting it and pressing X. Add a new cube by pressing Shift + A and selecting Mesh > Cube.
Step 2: Creating the Seat
Scale the cube to form the seat: Press S to scale, then Z to constrain the scale to the Z-axis. Scale it down to about 0.2 units thick. Scale it along the X and Y axes (S, then Shift + Z) to make it roughly rectangular, like a chair seat. Place the seat slightly above the grid by pressing G, then Z to move it up.
Step 3: Adding Legs
Add a cylinder for a leg. Press Shift + A and choose Mesh > Cylinder. Scale it down (S) to make it thin like a chair leg. Move it to one corner of the seat using G and position it carefully.
Duplicate the leg. Press Shift + D to duplicate and move it to the other corners of the seat. Ensure all four legs are evenly placed.
Step 4: Creating the Backrest
Add another cube. Press Shift + A and select Mesh > Cube. Scale it to form the backrest: scale along the Z-axis to make it tall and the X-axis to make it wide. Keep it thin on the Y-axis.
Position the backrest. Move it up and align it with the back edge of the seat.
Step 5: Refining the Model
Use the Bevel Modifier. Select all parts of the chair, go to the Modifiers tab, and add a Bevel Modifier. Adjust the bevel amount to soften the edges.
Go to the Material Properties tab, create a new material, and set the color and roughness to simulate wood or metal.